I love having extra cuts and extra card fronts to whip something up in a hurry. I wrote my monthly penpal letters this morning and needed to get cards made before the mailman came, so I went to my shoebox of leftover cuts and unfinished card fronts to see what I could pull together. This is what I came up with:
Not excellent, but pretty good! And the letters are the stars, anyway. 😁
A long while ago, I made card fronts but never finished the cards, but I saved them. Today I needed four note cards, so I pulled out the card fronts. They had a decidedly steampunk vibe to them, so I did some quick cuts on my Silhouette using Lettering Delights’ Steampunk Simple Shapes svgs. I added some gold colored brads and called it done. I really like how they turned out!
I especially like the bee one!
Oh, and in case you’re worrying about Shake Hair Barbie, she’s all good now! She got a made-to-move body and is better than ever!
Poor Shake Hair Barbie. She’s so sweet that she was irresistible to a teething puppy.
First a little spa treatment — facial and shampoo.
She seems really happy to have all that dog saliva and plastic bits off her face and out of her hair!
Hair all brushed out and now she’s waiting patiently for her donor body to arrive. Shake Hair is such a good sport. I think she deserves a new outfit, too, after her ordeal, don’t you? I’ll get knitting.
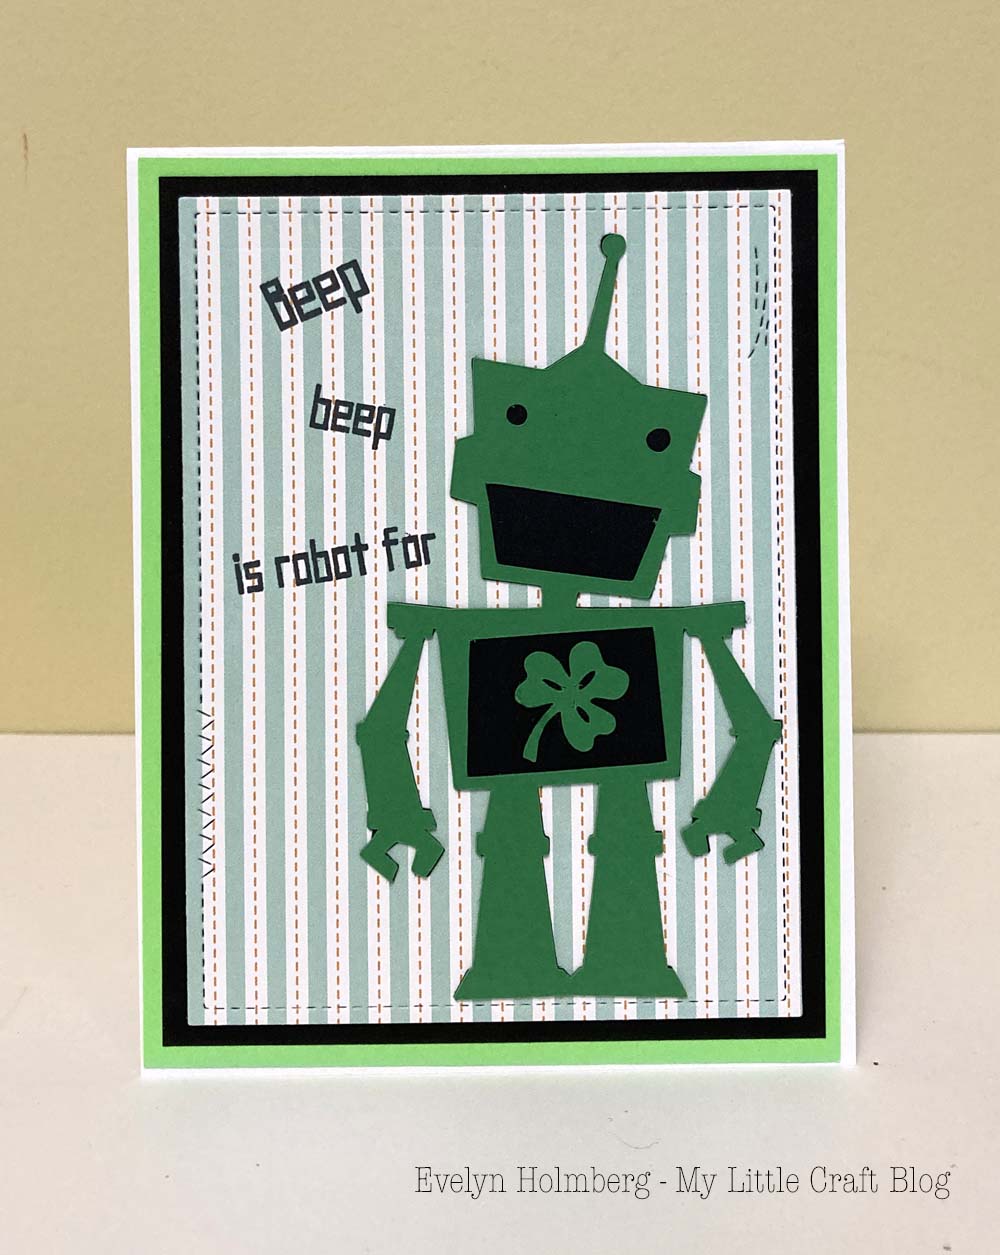
I seem to be running out of ideas for St. Patrick’s Day cards! I looked through all the ones I’ve made in the past (you can find the posts here if you want to see them) and was trying to think of something different. Here’s what I came up with:
I found some green patterned paper in my stash that would work and chose this cute little robot from the Robotz Cricut cartridge. That was one of my first cartridges! His green color and the shamrock make him Irish, see? (It’s a bit of a stretch, I know . . . )
The sentiment on the outside of the card is from an old set of clear stamps from My Craft Spot called Robots. I bought it to go with the Robotz cartridge way back when, but I think this may be only the second time I used it. On the inside, I stamped Happy St. Patrick’s Day from Lawn Fawn’s Celebration Scripty Sentiments, which I think is the perfect sentiment set. It has nine sentiments that just say “Happy ___” for different holidays and occasions throughout the year.
I honestly don’t remember where the shamrock is from. (I made these cards back in January.) The stitched rectangle die is from the Impression Obsession Crazy Stitched Set. I really like it! It adds just a touch of whimsy to the cards.
Since it’s St. Patrick’s Day, I want to make these cookies. I shared the link to the recipe on an earlier blog post, but the recipe doesn’t seem to be there anymore, so I made it into a jpg in case you want to make them, too. I cut them out with a shamrock shaped cutter, just for fun!! They’re yummy!!
Thought I’d get a start on holiday cards this year. I got 12/14 of my Valentine’s Day cards done, the ones going to close friends and family. The last two will be children’s cards for my grandkids.
I used the very last Valentine’s paper that I have! Very excited about that! First, because I feel like I’ve completed something and second, because I’ll have to buy new Valentine paper next year! 😉
I used the cupid from the Cricut Cartridge Close To My Heart: Artiste cartridge for the cupid. I cut it in Cricut Design Studio and the offset feature actually worked for me this time. The solid pink layer is the Honeybee Fluttering Hearts Pierced Cover Plate.
Here’s the inside. I used clip art and a font that are saved on my computer.
Next up, St. Patrick’s Day cards!! (and birthday cards. Can’t forget those!)
Some of you may have noticed that I did not have a Cut it Up project this time around. I have “retired” from Cut it Up and one of my long-time design team members, Larelyn, has graciously taken it over so it can go on. I thought that warranted recognition on my part, so what better way to mark the occasion than to pare down and organize my crafty supplies!
First I went through all my stamps and physical dies and sent the ones I knew I wouldn’t use anymore to a crafty friend whom I knew would put them to good use. That was the paring part. Next up was organization, specifically for my collection of dies. I looked at how other crafters organized theirs and got a few ideas.
One great idea was to use magnetic vent covers to keep the dies in place. I went with these from Lowes. I cut them down to 5″ x 7″. That got me three from each sheet, and was the perfect size to fit into the Ikea shoe/photo boxes I was already using.
I had just been keeping the dies in the cheap plastic packaging that they come in, but they had become all ripped and torn and the dies kept falling out. Some other crafters recommended Avery Elle Stamp & Die Storage Pockets, so I got them and they’re great!
Next up was sorting and categorizing the dies. You can see my categories in this picture.
I broke up some of the die sets because the dies within really belonged in separate categories. Also, some of my “pages” have dies from different companies on them to save room. Here’s an example:
This is probably the most organized part of my craft room at the moment.
The bottom shelf contains my newly-organized dies and my embossing folders.
Next shelf up has my circular knitting needles and my 6 x 6 paper pads.
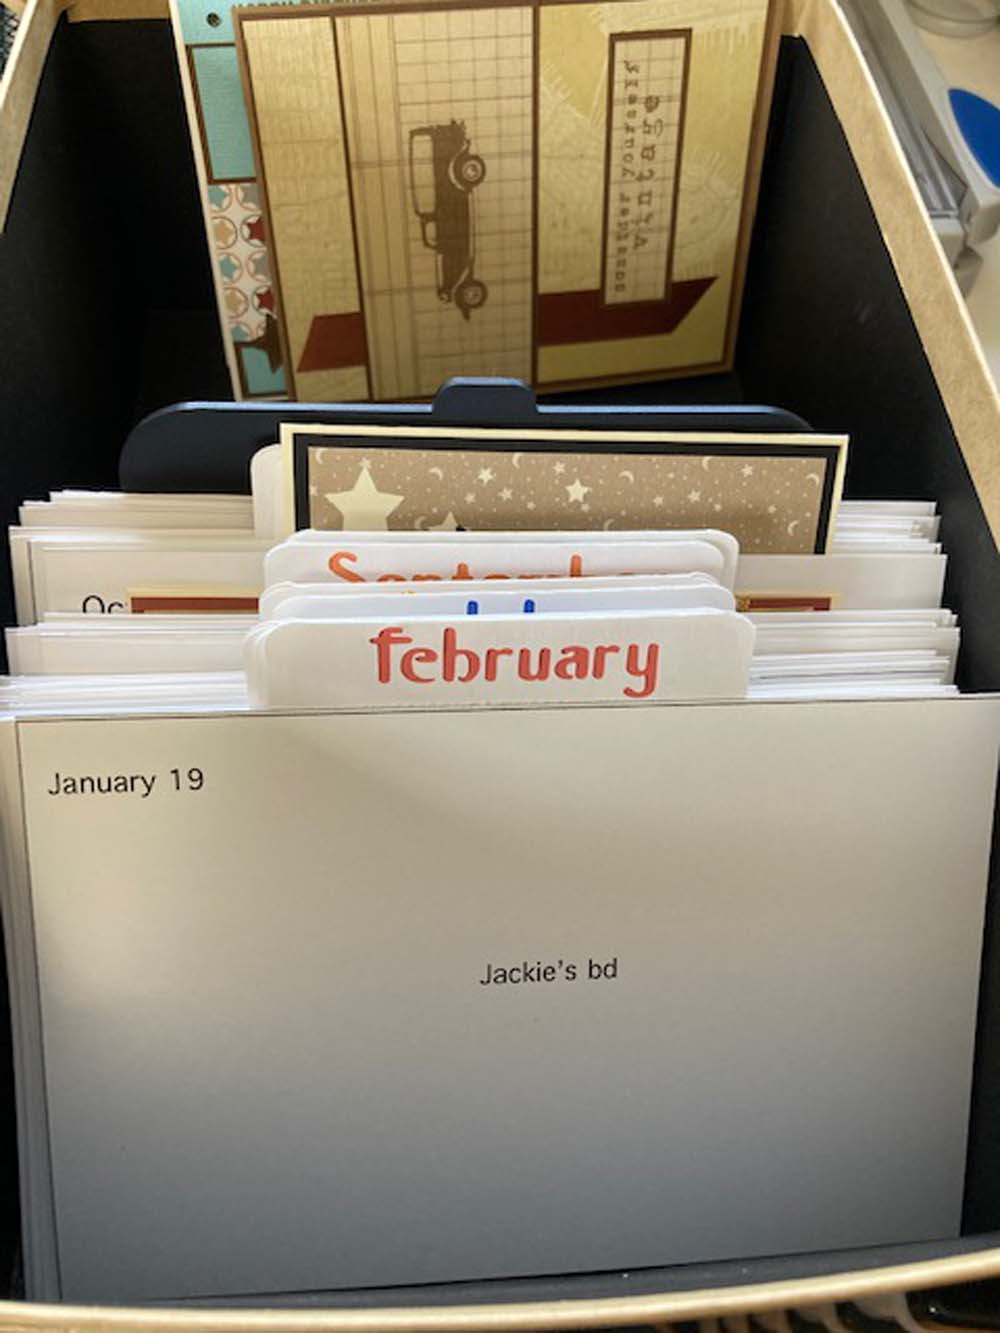
Above that is my birthday card file system and any extra die cuts that I can use in a pinch, and the top shelf is for decorations.
About that birthday card file – I made a tab for each month and a card for each person to whom I send birthday cards. The top left-hand corner of each file card has the birthdate and the center of the card has the person’s name and mailing address. Everything is kept in date order. As I make cards throughout the year, I place the birthday card behind the person’s file card and as I send out birthday cards, those file cards move to the back of the box. You can see that I’ve already sent out all the cards for people whose birthdays are in January. (Jackie’s gets hand delivered.)
And I have to show you what’s on top the very top of this bookcase. It’s my Easter basket from when I was a little girl!
So sweet!! And fun to see my mother’s handwriting on the little chick 💕.
On to my day! It includes letter writing, cross stitch, and knitting. What are you doing today?
Getting back into the swing of things after the holidays. There were already a couple birthdays this new year, but I sent cards that I made last year and had filed away. This is the first card I’ve made this year. It’s for my husband’s boss.
I used Valentine Cupcake from Miss Kate Cuttables for the focal image. The Happy Birthday sentiment is from STAMPlorations; it’s included in their Skinny Sentiments bundle. The font for Jackie is saved on my computer. It’s called CK Man’s Print. I used an offset to make it stand out against the background, and an internal offset under the last few letters that fall off the cupcake.
Looking at it now, I must have messed up the layers. That top layer of whipped cream should be white, shouldn’t it?
Happy New Year says it all! It’ll be a brand new year very soon! I hope 2023 is a good year for you and your family. We’re celebrating by creating new year projects over at Cut it Up. Here’s mine.
I used the January Word Shaped Card from our gracious sponsor, The Cutting Café. Her files are always so much fun to play with. I added some party accessories from the Cricut Create a Critter 2 cartridge. They’re not as bright and colorful as I would like them to have been because I did the whole front of the card as a print and cut instead of cutting out the individual parts from colored card stock.
This was a lot of fun to put together. The blue paper is a digi, saved on my computer. I thought the colors were perfect for a celebration!
There are two prizes for this challenge, so two chances to win! The first is 3 awesome sets of the winner’s choice from The Cutting Café, and the second is this batch of yummy crafty goodies from my design team member, Leslie. New crafty items for the new year!
I hope you join us for this celebration of the new year by creating and linking a project over at Cut it Up!
Here is my project for our Christmas-themed challenge over at Cut it Up. It’s a little bag that I’ll tuck a gift card inside.
I’ve had that hilarious Santa paper for years and am so happy to finally use it! Still have plenty left for a card or two for next year. The dies are from Pink and Main, the Scallop Rectangle Die (which I cut off a little piece from the bottom) and the gift bag dies, which must be retired because I don’t see it on the site anymore.
Here is the back showing the little semicircular closure. I used one of those tiny velcro dots to keep it down. The snowflakes are punches.
Head on over to Cut it Up to check out the other designers’ projects, then link your own Christmas project for a chance to win a $20 gift certificate to Pink & Main!
Brrr! Winter is on its way, and we at Cut it Up are ready to greet it with our winter-themed projects.
Our sponsor for this challenge is Oddball Art. I have two card projects to share with you using their products. The first card uses their Kawaii Big Eye Unicorn, which I colored with colored pencils. I created a winter scene for the unicorn. She looks like a baby to me, so I think I’ll be saving this card to celebrate the birth of the next baby girl born in winter.
I used a digital paper called Let it Snow Lt Blue from Snowy Overlay Papers that is saved on my computer. For the trees, cardinal, and squirrel, I used Forest Scene Builder Dies from Newton’s Nook and the Scallop Rectangle Dies are from Pink and Main.
My second project is a set of four note cards that I’ll be sending to my “penpals” in January. These are elderly friends and family members who love to receive little bits of news every month. They’re well aware by now of which seasons are my favorite and least favorite! They feature Oddball Art’s Big Eye Whimsical Christmas – Peggy Sue’s Winter Blues image.
I overlaid the sentiment from the Oddball Art image onto a photo of my back yard from 2018 and printed it onto card stock. I cut that out using My Favorite Things’ Elegant Reactangle Stax die. I brought Peggy Sue into Silhouette Design Studio and traced her. Then I used a .05 offset and cut her out. I glued three of them together to give her a little dimension on the cards.
And now you know how I feel about winter!
Head on over to Cut it Up to check out the other designers’ winter projects, then link up your own for a chance to win a $10 coupon code to Oddball Art!